Nasogastric Tube Insertion Procedure: Indications, Technique, Verification, and Safety
September 29, 2025
12 min. read

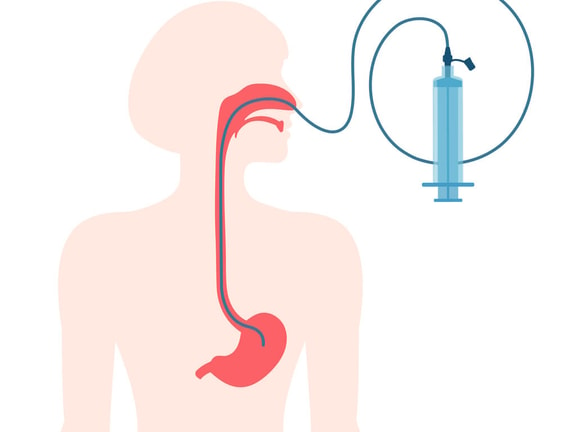
Nasogastric tube insertion is one of the most common bedside procedures, used for gastric decompression, medication delivery, and short-term enteral nutrition. But it is also one of the riskiest if placement is not confirmed, as misplacements into the airway can cause life-threatening harm. With clear protocols and evidence-based verification methods, teams can reduce complications, improve patient safety, and support timely care.
In this article, we outline indications, contraindications, preparation steps, a practical step-by-step example, evidence-based placement verification, and risk-reduction practices grounded in current guidance.
Indications—and when to reconsider
Before inserting a nasogastric tube, it’s essential to ask two key questions: Is this the right intervention for the patient, and is it safe to proceed?
Common indications include:1
Gastric decompression in bowel obstruction or ileus
Gastric content sampling
Medication administration when oral intake is not an option
Short-term enteral feeding when the stomach can receive feeds
Contraindications (absolute or relative) include:1
Basilar skull fracture
Severe mid-face trauma
Esophageal varices with active bleeding risk
Recent upper-GI surgery (per surgeon guidance)
Profound coagulopathy
Known esophageal strictures
Always conduct a risk–benefit assessment and consult the treating team before proceeding.
Alternatives: If repeated blind insertions are unsuccessful or unsafe, consider guided approaches (endoscopic, fluoroscopic, or electromagnetic)2 depending on available resources and local policy.
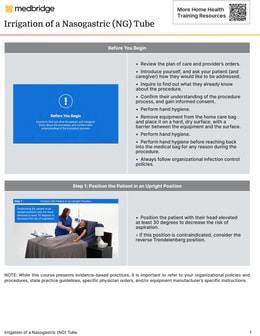
Download the Irrigation of a Nasogastric Tube (PDF)—a printable guide covering indications, required supplies, step-by-step sterile technique, troubleshooting, and documentation notes.
Irrigation of Nasogastric Tube
Submit a few brief details to unlock your free Irrigation of Nasogastric Tube guide!

Preparation: assessment, positioning, and equipment
A safe and successful nasogastric tube insertion starts well before the tube touches the patient. Careful preparation not only makes the nasogastric tube insertion procedure smoother but also prevents complications down the line.
Pre-procedure assessment
Confirm indication and review history for facial or esophageal injury.
Review anticoagulation status and bleeding risk.
Explain the procedure, obtain consent per policy, and assess gag reflex and airway protection needs.
Positioning
Use High-Fowler’s (60 to 90°) if tolerated. Otherwise, maintain at least 30° head-of-bed elevation during and after placement to reduce aspiration risk. Use reverse Trendelenburg if upright positioning is contraindicated.3
Equipment checklist
Water-soluble lubricant: eases passage and reduces mucosal trauma during insertion.
Catheter-tip syringe (30 to 60 mL): used for aspirating gastric contents, flushing the tube, or administering irrigations.
pH strips validated for gastric aspirate: allow objective verification of placement at the bedside.
Tape or a securement device: helps stabilize the tube and prevent accidental migration.
Clean gloves, emesis basin, and water with a straw (if safe to sip): support infection control, patient comfort, and swallow-assisted advancement.
Radiography available per policy.
Note that access to radiography is an essential back up when the aspirate is inconclusive or unavailable, since an abdominal x-ray remains the most reliable confirmation method.
Measurement
Use the NEX method (measure from the nose to the earlobe to the xiphoid process) to estimate the distance from the nostril to the stomach.
Mark the tube at this length to guide advancement during insertion.
Document the measurement as a baseline for future checks, since changes in external tube length may signal displacement.
Example: step-by-step nasogastric tube insertion
Purpose: Blind bedside placement for decompression or feeding, always followed by objective verification.
Real world example: A 72-year-old woman with small-bowel obstruction is nothing by mouth (NPO) and needs gastric decompression. You position her in High-Fowler’s, measure NEX at 58 cm, and mark the tube. During the first attempt through the right nare, she begins coughing and desaturates—you stop, withdraw, and allow recovery.
On the second attempt through the left nare, you use a gentle chin tuck and advance along the nasal floor to the mark. Because she’s NPO, you skip swallow assist. No aspirate is obtained, so you lightly secure the tube and order an X-ray. A qualified reader confirms the tube follows the midline, crosses the diaphragm, and rests in the stomach. You then fully secure the tube, document the external length (58 cm) and verification method, and place an “OK to use” order.
Use this bedside sequence; coach the patient through each step and treat cough, desaturation, or voice change as a stop signal:1
Hand hygiene and personal protective equipment (PPE): Wash hands, put on clean gloves, and follow standard precautions.
Assess nares: Select the more patent nostril; a topical anesthetic may be used per policy to improve comfort.
Measure and mark: Use the NEX method to estimate depth, and mark the tube at the anticipated gastric length.
Lubricate: Apply water-soluble lubricant to the distal 10–15 cm of the tube to reduce friction.
Head and neck position: Slight flexion with a chin tuck helps direct the tube toward the esophagus instead of the airway.
Advance to the nasopharynx: Pass the tube gently along the nasal floor. If the patient begins coughing, desaturates, or shows respiratory distress, stop immediately, withdraw, and allow recovery.
Swallow assist (if safe): Encourage small sips of water and swallowing as the tube reaches the oropharynx; skip if aspiration risk is high or if the patient is NPO.
Advance to the mark: Continue to the measured length without forcing. Resistance, persistent coughing, or a sudden voice change should prompt withdrawal and reassessment.
Initial checks (do not use yet): Verify the external length at the nares, lightly secure the tube, and move to placement verification before administering anything.
Securement: Once placement is confirmed, secure the tube with tape or a tube holder and document the external length for ongoing checks.
Placement verification: what the evidence supports
Misplacement of a nasogastric tube into the airway can cause severe harm. Patient safety bodies and clinical reviews consistently emphasize that objective verification is mandatory before first use and after any event that may shift the tube’s position, such as vomiting, coughing, or accidental traction.
First-line: pH testing of gastric aspirate
The first step in confirming placement is testing the gastric aspirate with pH strips validated for gastric aspirate. A gastric-range pH supports correct positioning, with most safety alerts accepting values of 5.5 or below. Some programs use a more conservative cutoff of 5.0 to reduce false negatives, which increases reliance on x-ray confirmation.2
If no aspirate can be obtained, repositioning the patient, gently advancing or withdrawing the tube, or retrying after a brief pause may help. Clinicians should also compare the visible external tube length, or the mark at the nares, with the baseline measurement from the original x-ray or insertion. Any change in length may indicate displacement. Importantly, unreliable bedside methods such as air insufflation (“whoosh test”) or bubble tests should never be used, as they are associated with adverse events.3
Radiographic confirmation
If pH testing is unavailable or inconclusive, radiographic confirmation is required. A competent practitioner should verify on the x-ray that the tube follows the midline, crosses the diaphragm, and terminates in the stomach (or post-pyloric if intended), with the entire course visible. Multiple guidelines identify abdominal x-ray as the most accurate method for initial confirmation when there is any doubt.⁴
Key rule
Do not feed or administer medications until placement has been confirmed—either by acceptable gastric pH or by an x-ray interpreted by a qualified professional. Skipping this step risks delivering feeds or medications directly into the airway, which can lead to life-threatening complications.1,3
Complications and risk-reduction practices
Potential complications
Although nasogastric tube insertion is a routine procedure, complications can range from minor discomfort to life-threatening injury. Patients may develop epistaxis, sinusitis, or sore throat, which are usually self-limited.
More serious risks include aspiration, esophageal or gastric perforation (rare), or pulmonary injury if the tube enters the airway. In cases of basilar skull fracture, the tube may even track intracranially. Over time, prolonged use may also cause nasal skin breakdown and pressure injuries at the securement site.¹
Risk-reduction practices
Complications are not inevitable—many can be prevented by adopting careful technique and reliable verification methods:2-4
Maintain head-of-bed elevation during and after placement to lower aspiration risk.
Use the chin-tuck maneuver to help direct the tube into the esophagus, pausing if respiratory symptoms occur.
Adopt a verification bundle by starting with pH testing using validated strips, confirming with x-ray when pH is unavailable or outside range, and re-checking after events such as vomiting, coughing, or tube manipulation.
Avoid unreliable techniques such as air insufflation auscultation (“whoosh test”), which have been directly linked to adverse events.
Escalate to guided placement (endoscopic, fluoroscopic, or electromagnetic) when blind attempts repeatedly fail, rather than persisting and risking injury.
Together, these strategies create a culture of safety, where verification is never skipped and complications are anticipated rather than reacted to.
Feeding, medications, and ongoing checks
Safe use of a nasogastric tube doesn’t end once placement is verified. Each use requires a quick but thorough reassessment to confirm the tube hasn’t shifted and remains patent for feeding or medication delivery. Skipping these steps increases the risk of aspiration, tube failure, or even life-threatening complications.
Verification before each use
Confirm the external length at the nares and compare it to the baseline measurement documented at insertion.
If there are signs of displacement—such as loose tape, a patient coughing fit, or unexplained respiratory changes—repeat pH testing or obtain an x-ray per policy.
Medication administration
Prefer liquid formulations whenever possible.
If tablets must be given, confirm they are safe to crush and compatible with nasogastric administration to avoid clogging or reduced absorption.
Flushing and patency
Flush with the recommended volume of water before and after medications and feeds to keep the tube clear.
If clogging occurs, gently flush with a 60 mL syringe of warm water. Do not downsize to a smaller syringe or apply excessive force, which may damage the tube.
Documentation and handoffs
Thorough documentation is not just a formality—it’s a key part of patient safety, continuity of care, and legal protection. Clear records help the next clinician quickly confirm placement, recognize changes, and respond appropriately if complications arise. At a minimum, documentation should include the following:
Indication for insertion and side selected
Size and type of tube
NEX measurement and final external length
Visible external tube length compared to baseline documentation
Patient tolerance of the procedure
Verification method and results (e.g., pH value with strip brand/lot or x-ray interpretation with reader name and time)
Securement method used
Any complications, difficulties, or escalation steps taken
Re-verification plans per protocol (e.g., after emesis, coughing episodes, or transport)
Communication is just as important. Share results with the patient and caregiver, and confirm understanding using teach-back when possible. This not only reinforces safety but also supports patient engagement in their care.
Quality and safety strategies
Even with skilled clinicians, small errors in nasogastric tube practice can lead to significant harm. Embedding safety strategies into daily workflows helps reduce variation and prevent avoidable events. Practical strategies include:
Standardized kits with CE-marked gastric pH strips and a concise algorithm that outlines acceptable pH ranges and next steps if aspirate is unavailable.
Brief refresher sessions focused on verification pitfalls and radiograph interpretation, reinforced with real patient-safety cases.
Audit and feedback loops to track near misses, x-ray readbacks, and documentation gaps, ensuring lessons learned translate into better practice.
Team drills or simulations to strengthen response to misplaced tubes and improve interdisciplinary communication in urgent scenarios.
Quick reference checklist: safe nasogastric tube insertion
When you’re at the bedside, you don’t always have time to review every detail. This condensed checklist highlights the essential steps for safe nasogastric tube placement—from preparation to verification and documentation—so you can work efficiently without compromising safety.
Assess indication and contraindications, and obtain consent per policy.
Position in High-Fowler’s, measure using the NEX method, and mark the tube.
Lubricate, flex the neck, and advance gently to the marked length, with swallow assist if safe.
Verify placement before use, and confirm with gastric-range pH or x-ray.
Secure the tube and document pH value or X-ray read, plus the external length.
Re-check placement after any event that could cause displacement (e.g., emesis, coughing, transport) and at scheduled intervals.
Next steps in nasogastric tube care
Mastering nasogastric tube care requires more than technical skill—it demands vigilance, teamwork, and a commitment to continuous learning. By applying these principles consistently, you not only safeguard patients during tube insertion but also raise the standard of care in every bedside procedure you perform.
For deeper training beyond insertion, explore the course Nasogastric Tubes—Irrigation, Maintenance, and Removal, which covers proper procedures as well as patient education, documentation guidelines, and care considerations. You can also access more procedures in the Medbridge Clinical Procedure Manual, an on-the-go resource with expert-reviewed instructions, safety checks, and video demonstrations to support home health clinicians at the point of care.
References
Sigmon, D. F., & An, J. (2022, October 31). Nasogastric tube. In StatPearls [Internet]. StatPearls Publishing. https://www.ncbi.nlm.nih.gov/books/NBK556063/
National Institute for Health and Care Excellence. (2016, December 9). CORTRAK 2 enteral access system for placing nasoenteral feeding tubes: Medtech innovation briefing (MIB48). NICE. https://www.nice.org.uk/advice/mib48
NHS England. (2016, July 22). Patient safety alert: Nasogastric tube misplacement: continuing risk of death and severe harm — Stage 2 resource set [PDF]. https://www.england.nhs.uk/wp-content/uploads/2019/12/Patient_Safety_Alert_Stage_2_-_NG_tube_resource_set.pdf
Singh, A., & Huang, C. (2024, April 10). Misplaced nasogastric tube resulting in aspiration. PSNet. Agency for Healthcare Research and Quality. https://psnet.ahrq.gov/web-mm/misplaced-nasogastric-tube-resulting-aspiration
Disclaimer
This article is for informational purposes and does not replace clinical judgment, institutional policy, or manufacturer instructions. Follow your organization’s protocols and applicable regulations.


